Getting Started
When starting to play Naraka's Showdown Mode, I recommended that you choose one hero to main and two secondary choices. This is because when you pass Normal and Hard difficulty missions, Showdown does not allow duplicate heroes on the same team. Picking two secondary choices helps to ensure that you are not left in a tight spot because someone else locked in your favorite hero(es) first. Ziping Yin is recommended to be one of your main 3 because of her being one of the only heroes that can heal & buff her teammates, but also dishes out great damage on her own.
Table of Contents
Advancing through the Story
There are a total of 8 chapters currently in the game. The chapters take place in Morus Isle and in Holoroth. Each mission has 2-3 heroes that it wants you to beat it on a certain difficulty with to unlock their corresponding lore segment.
Difficulty Levels
As of right now there are 3 difficulty levels: Normal, Hard and Nightscream.
Normal difficulty can be considered the tutorial of the game.
Many of the missions will have limited mechanics, enemies will have smaller movesets and attack less often, and bosses are limited to 1 phase.
Hard difficulty introduces Omens, semi-random events that can make certain enemies stronger or add hazards to the battlefield.
Furthermore, it introduces more boss phases and more aggressive enemies.
Nightscream difficulty brings in mutliple Omens per mission and significantly more aggressive enemies.
This will be your first major difficulty spike that you'll face as everything hits harder and takes longer to kill.
However, at this point the missions here will have better loot pools to complete your Souljade builds with.
Fatigue System
- At 0 to 600 fatigue you will recieve 150% rewards (50% more rewards).
- At 601 to 1800 fatigue you will recieve 100% rewards.
- At 1801 to 2400 fatigue you will recieve only 75% rewards.
- Once you have reached 2400 fatigue, you can no longer receive any Showdown-based rewards until the next reset.
Every mission consumes fatigue when ran, with the amount consumed depending on the type of mission and how much of it you completed.
Fatigue that you fail to consume during a weekly period will give you a small amount of Souljades as compensation on your next completed mission.
Mission Types
As of right now, there are 25 different missions available.
Each mission can fit into a category, those being Stronghold Assault, Wave Defense,
Boss Fight, Enigma Domain, Nirriti's Ruins, Yama's Abyss and the newest category Tempered Inferno.
Stronghold Assault
- Missions: Eventide Ember, Desert Tribulations, Chaos of the Immortals, Dangers in the Deep, Miasma Swirl and Forest Peril.
- Objective: Kill Stronghold's chest guards and the final boss.
- Description: Serve as great Sense level boosters because they're generally a much lower difficulty,
don't require you to kill everything, and are guaranteed to drop 6 or more souljades.
Wave Defense
- Missions: Dharma-Ending Ruin, Immovable, None Shall Pass, and Buried Giant.
- Objective: Kill all mobs and boss(es).
- Description: Generally the longest mission of each chapter, but have more sought-after drops in their loot pool.
Heavier focuses on teamwork and a smaller pool of guaranteed Souljades, however, due to the number of enemies, can have the largest amount of drops.
Boss Fight
- Missions: Omnious Descent, Toppled Mountain, Gelid Yushan, Together We Stand, Chasm Undertow, Autumn Plains Turmoil, Culmination and Manticore Hunt.
- Objective: Defeat the boss.
- Description: Can be the longest or shortest mission depending on how strong your team composition is.
Usually contains the most sought-after Souljades, but has a lower drop rate due to the small number of sources and a limited amount of Omens. Consumables are the most limited here, so effective use of heals is warranted.
Enigma Domain
- Missions: Topaz and Peak.
- Objective: Reach Enhance Level 8 or 9 and defeat all bosses.
- Description: Having a max clear time of ~16 minutes, a pre-established strategy is encouraged,
with Archers being ignored and Hammer Ents & Warlocks being prioritized.
Nirriti's Ruins
- Missions: Normal, Hard, Nightscream and Legend
- Objective: Clear all 15 rooms.
- Description: The new longest mission type we have as of now.
Gets progressively difficult as you make it down the stages, with the most extreme difficulty on Legend.
Yama's Abyss
- Missions: Bronze I through Paragon 15+
- Objective: Defeat all enemies.
- Description: The ranked mode for Showdown.
Each stage offers a different set of challenges, as enemies get progressively stronger the higher up you go.
Tempered Inferno
- Missions: Normal and Nightscream
- Objective: Defend the furnace from 8 waves of enemies of increasing difficulty.
- Description: The end-game Curio grinding stage for Showdown.
Heroes
Difficulty


Description
With her long-range attacks and Aegis-shattering skills, this hero can dish out consistent damage to her enemies. Her ultimate skill unleashes a devastating blast that drains the Aegis of multiple foes and restores her own health. She is a balanced hero who can survive and thrive in any combat situation.
Archetype
Primary
Aegis DPS
Secondary
Health DPS
Weapons

Longsword

Pistol

Difficulty
Description
This hero has one of the safest kits while also being able to deal massive Aegis damage. Her Ultimate ability gives her a rapid firing mech that allows her to deal with pesky Green Ghosts and Lightning Towers with ease. It also comes with a cannon mode that hits for a small AoE and can apply a buff to her teammates damage in a radius around her for a short period.
Archetype
Primary
Health DPS
Secondary
Aegis DPS
Weapons

Nunchucks

Musket
Difficulty
Description
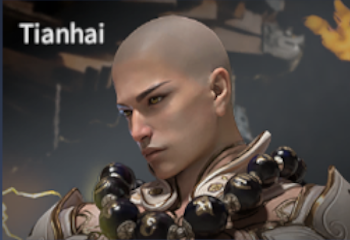
This hero is a skilled duelist who can parry attacks with ease with his ability and also grant himself damage reduction. He can use his ultimate skill to aggro a boss for his teammates to focus purely on dealing damage. Furthermore, his ultimate restores his Health fully when activated.
Archetype
Primary
Tank
Secondary
Health DPS
Weapons

Longsword

Swarm
Difficulty
Description
This hero is a formidable fighter who can strike hard with his great sword. His ability can be used to dodge attacks, deal decent Aegis damage over time, or to immobilize enemies without Aegis temporarily. His ultimate skill makes his team immune to debuffs and creates a barrier that blocks ranged attacks and slows down enemies who approach him.
Archetype
Primary
Health DPS
Secondary
Aegis DPS
Weapons

Greatsword

Bow
Difficulty
Description
This hero is a fiery fighter who can incinerate large groups of enemies with his cannon and bosses with his fireballs. He can use his fireball ability to make his targets more vulnerable to attacks for a short time. His ultimate skill boosts his damage by 10% and lets him unleash unlimited fireballs until his Rage is depleted.
Archetype
Primary
Health DPS
Weapons

Dual Blades

Cannon

Difficulty
Description
A core hero for pretty much any team especially in more difficult content. She can safely revive her teammates from a distance, is the only hero who can heal someone other than themselves, and give some great defense and attack buffs alongside it. Her Ultimate can also be influenced by Temulch, Tarka & Valda Cui for varying effects.
Archetype
Primary
Support
Weapons

Katana

Repeating Crossbow

Difficulty
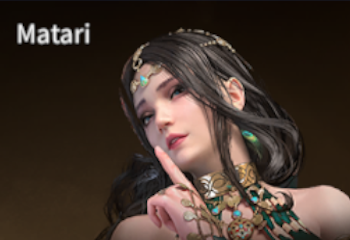
Description
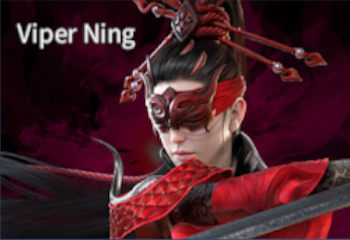
A single-target focused hero that can soak her enemies, reducing their damage dealt by 10% and an Ultimate that grants a separate health bar that allows her to CC enemies around her or deals consistent damage to a boss in safety. When with a Tarka, her Soaked debuff counteracts Tarka's Vulnerable debuff but deals the burn damage instantly instead of overtime.
Archetype
Primary
Health DPS
Secondary
Support
Weapons

Spear
Musket
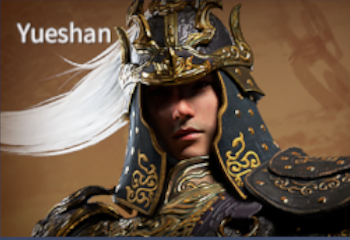
Difficulty
Description
This hero is a powerful and agile fighter who can charge up his attacks while moving around the battlefield. He can use his ability to greatly weaken his enemies' attack power for 10 seconds and his ultimate skill to withstand a lot of damage while dealing area-of-effect damage. Like Tianhai, he can also heal himself by entering his ultimate skill mode.
Archetype
Primary
Health DPS
Secondary
Tank
Weapons

Polesword
Cannon
Difficulty
Description
This hero is a swift fighter who's stronger attacks are more focused around her Dagger Dash. She can use her ability, up to two times, to boost her damage by 40% and teleport a short distance away. Her ultimate skill enhances her with life-steal, reduces the cooldown of her ability and alters her ability into an attack, allowing her to deal massive damage and heal herself quickly.
Archetype
Primary
Health DPS
Weapons

Dagger
Pistol
Difficulty
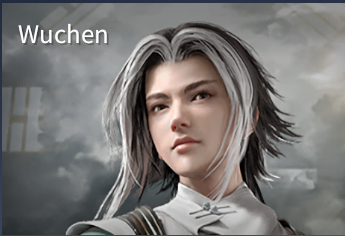
Description
A great zoner who can deal decent damage from a distance. Features one of the fastest Defuses as of yet and can repair his teammates armor using his ability. His ability also doubles as a projectile shield, to prevent any pesky snipes. However, his ultimate is fully offensive, able to even stagger bosses at the end of one of his spells.
Archetype
Primary
Health DPS
Secondary
Support
Weapons

Fan
Swarm

Difficulty
Description
The 2nd hero to feature the mighty greatsword, Yoto Hime truly packs a punch. Features an ability that offers her mobility, as well as some Astral Aegis shred. With an Ultimate that provides survivability while also boasting some extremely high DPS against whoever she decides to strike down.
Archetype
Primary
Health DPS
Secondary
Aegis DPS
Weapons
Greatsword
Repeating Crossbow

Difficulty
Description
Featuring the cogeneric of the Dual Blades, the Dual Halberds, Tessa brings in a wide variety of crowd control and damage from her kit. Her ability can group mobs while dealing a great chunk of damage. Her ultimate makes her leap forward and mark all enemies in the surrounding area, interrupting them. All marked enemies will take additional damage from her attacks, and when the mark expires will deal a large amount of Aegis-Damage in proportion to the damage dealt during the mark.
Archetype
Primary
Health DPS
Secondary
Aegis DPS
Weapons
Dual Halberds
Bow

Difficulty
Description
A powerful team buffer that specializes in optimizing elemental damage. Her skill boosts the elemental accumulation rate of herself and her teammates for 12 seconds. It also grants an anti-interruption shield that will block some damage. Her Ultimate provides immunity to fatal damage 1 time for all teammates and heals overtime. She will be a welcome addition to any team!
Archetype
Primary
Support
Secondary
Health DPS
Weapons
Spear
Repeating Crossbow

Difficulty
Description
The Frosty Shadow, this hero dashes through enemies with her powerful Skill shredding their Astral Aegis and freezing non-Boss enemies. Her Ultimates deals heavy damage overtime in the area in front of her and the damage scales from Ice Blast DMG. This makes Ice Blast related builds most effective on her, alongside her Skill resetting whenever she is frozen and having bonus accumulation only for Ice.
Archetype
Primary
Health DPS
Secondary
Aegis DPS
Weapons
Longsword
Bow
Glossary
Important Terms
- Thundershock = A unit used to indicate the accumulation of Divine Thunder.
- (on the player) builds up from getting hit by Omnious Aureate & Thunder Omens or landing attacks with Thunderpull equipped.
- (on enemies) builds up from landing attacks while having at least 1 total Thunder-Wielding from your Souljades (or Thunder Essence in Yama's Abyss).
- Frostbite = A unit used to indicate the accumulation of Ice Blast (on enemies) or Freezing (on the player).
- (on the player) builds up from getting hit by Matron of Yushan and certain Omens.
- (on enemies) builds up from landing attacks while having at least 1 total Ice-Wielding from your Souljades (or Ice Essence in Yama's Abyss).
- Divine Thunder = elemental damage that staggers those afflicted by it.
- (on the player) 4 strikes of lightning that occur when surpassing the Thundershock threshold, shown by the yellow bar at the bottom left.
- (on enemies) a blast of electricity that deals major damage and staggers when enough Thundershock is accumulated.
- Freeze = result of accumulating Frostbite beyond a threshold, stuns the player for a few seconds.
- Ice Blast = elemental damage that knocks enemies up slightly, occurs when enough Frostbite is applied to them.
- Burn = A status effect that deals damage over time. Only scales with Attack, Sense Suppression and Burn Damage Bonuses.
- Soak(ed) = A status effect that reduces attack by 5% on the reciever.
Has 5 sources:
- Frost Douse (Potential)
- Draco Stride (Souljade)
- Hydroflare - Underwater Draco (Anima Ring)
- Water Trap: Showdown (Valda's Ability)
- Rising Tide: Showdown (Valda's Ultimate)
- Hydroflare = A status effect caused by the combination of Burn and Soaked on the same target. Instantly deals the remaining damage left on the Burn and clears both the Burn and Soaked status.
General Terms
- Astral Aegis = Yellow bar above certain enemies that prevents stagger when active and when broken causes you to deal 2x damage to them.
- Charged Attack = Weapon-based attack that must be charged prior to be able to be used. Are always a Focus Attack.
- Counterstrike = Special attack after a parry.
- Dodge Cancel = Using a dodge right after an attack lands to cancel the end-lag. See Dodge Canceling.
- End Game = The peak difficulty of the game, made up of Enigma Peak, Speedrun and later stages of Yama's Abyss. Both missions require good builds, strategy, and skill to clear effectively.
- Focus Attack = An attack that can be parried, lights your hero in a blue light when using.
- Horizontal = Left Click | Right Bumper | R1.
- Late Game = Point in time right before you reach the level cap and can attempt the end-game.
- Martial Skill: Aegis-Break = Showdown-exclusive attack unlocked at hero level 3. Deals bonus damage to Astral Aegis.
- Martial Skill: Defuse Counterattack = Showdown-exclusive counter attack unlocked at hero level 12. When activated will negate any attacks within a window (varies by hero). If an enemy attack is negated, you can follow up with a counterattack that deals heavy damage to Astral Aegis.
- Omens = modifiers to a mission that can make certain enemy types stronger or add hazards to the environment.
- Opening = Short period after an attack chain where you have time to fit in an attack safely.
- Parry Counter = Exclusive to bosses in Showdown, follow-up attacks shortly after being parried, usually much faster than normal attacks.
- RNG = Random Number Generation, the way that programs handle randomness.
- Sense Suppression = Beings above in Sense Level from an enemy will cause them to do more damage to them and receive less from them and vice versa.
- Uncharged Attack = Weapon-based attack that doesn't require charging to activate. Includes follow-ups to charged attacks.
- Vertical = Right Click | Right Trigger | R2.